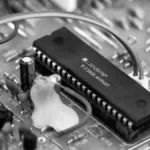
The dot/bar display driver LM3914 IC is an excellent choice for creating a battery level indicator. This versatile IC simplifies converting voltage into an LED display, allowing users to monitor battery levels with clarity and precision. The dot/bar display driver LM3914 lights up LEDs based on voltage variations, providing a straightforward representation of power levels. With its ability to operate in both dot and bar modes, it is suitable for a wide range of applications, including portable devices and automotive systems.
Key Takeaways
-
The LM3914 chip changes voltage into an LED light display.
-
Pick dot mode to save power or bar mode for better visuals.
-
Adjust the potentiometer to set the voltage for correct readings.
-
Make sure wires are tight and check voltage if problems occur.
-
This project works for many devices, like gadgets or solar setups.
Understanding the LM3914 IC
Key Features
The LM3914 IC is a dependable dot/bar display driver. It helps show analog voltage levels clearly. Here are its main features:
-
Analog to Visual Conversion: It changes analog voltage into a visual display with up to 10 LEDs. This makes voltage levels easy to understand.
-
Operational Modes: You can pick dot mode or bar mode. Dot mode lights one LED at a time to save power. Bar mode lights several LEDs for better viewing.
-
Internal Voltage Reference: The IC has a built-in reference voltage. This ensures accurate voltage comparisons.
-
Efficiency: It uses very little power, making it great for portable devices.
-
Scaling Options: It works with both linear and logarithmic scaling. This makes it useful for many purposes.
|
Feature |
Description |
|---|---|
|
Analog to Visual Conversion |
Turns analog voltage into a display using up to 10 LEDs. |
|
Operational Modes |
Works in dot mode or bar mode for different needs. |
|
Internal Voltage Reference |
Compares input voltage with a built-in reference for accuracy. |
|
Efficiency |
Uses low power, perfect for portable and energy-saving devices. |
The LM3914 IC is used in battery indicators, audio meters, and car gauges. It gives quick visual feedback, making it great for monitoring systems.
How It Works
The LM3914 IC changes an analog voltage into an LED display. Here’s how it works step by step:
-
Input Signal Reception: It takes in an analog voltage, like from a battery.
-
Reference Voltage Comparison: It compares this voltage to its built-in reference voltage.
-
Voltage Segmentation: The voltage is split into parts, each linked to an LED.
-
LED Activation: LEDs light up based on the voltage level. Higher voltage lights more LEDs.
-
Display Mode Selection: Choose dot or bar mode by setting Pin 9.
-
Built-In Current Regulation: It controls LED current for steady brightness.
-
Cascading for Larger Displays: Connect more LM3914 ICs for bigger displays.
In a battery indicator, the LM3914 lights LEDs to show charge levels. For example, a 12V battery might use LEDs where each one shows 1.2V. This helps users check the battery quickly.
Tip: Use dot mode to save power or bar mode for detailed visuals.
The LM3914 IC makes creating visual indicators simple and is useful in many projects.
Components for a Battery Level Indicator
Important Parts
To make a good battery level indicator, you need certain parts. Each part helps measure voltage and show it with LEDs. Here’s a list of the main parts:
-
LM3914 IC: This is the main part. It changes voltage into an LED display.
-
10 LEDs: Usually, three red, four yellow, and three green LEDs are used. They show different battery levels.
-
Resistors: Common ones are 18KΩ, 4.7KΩ, and 56KΩ. They set voltage and control current.
-
Potentiometer (10KΩ): Adjusts the voltage range for better accuracy.
-
12V Battery: Powers the circuit and is used for testing.
-
SPST Switch: A simple switch to turn the circuit on or off.
-
Connecting Wires and Breadboard: Help connect and build the circuit during testing.
|
Specification |
Details |
|---|---|
|
IC Model |
LM3914 |
|
Operating Voltage Range |
3V to 25V DC |
|
Current Regulation |
Yes (no resistors needed) |
|
Voltage Monitoring Range |
3V to 15V DC |
|
LED Driver Outputs |
Current regulated |
|
Internal Voltage Reference |
1.2V to 12V DC |
|
Programmable Output Current |
2mA to 30mA |
|
Temperature Range |
0 to 70 degrees Celsius |
The LM3914 IC is dependable and flexible. It works with both linear and logarithmic scaling. This makes it great for many uses, like checking power levels.
Extra Parts
Extra parts can make the battery indicator better or easier to use. These include:
-
Voltage Regulator (e.g., LM7805): Keeps the input voltage steady.
-
Heat Sink: Helps cool the circuit when using more current.
-
PCB (Printed Circuit Board): Makes the circuit smaller and more permanent.
-
Enclosure: Protects the circuit and makes it look neat.
These extra parts are not required but can make the indicator last longer and work better.
Tip: If the input voltage changes a lot, use a voltage regulator. This keeps the LM3914 IC working smoothly.
Circuit Design and Assembly

Circuit Diagram Overview
The LM3914 IC makes building a battery indicator easy. This circuit checks battery voltage and shows it with 10 LEDs. Each LED lights up for a specific voltage range, showing the battery’s charge level clearly.
The circuit needs parts like the LM3914 IC, LEDs, resistors, and a potentiometer. The battery voltage goes to Pin 5 of the IC. The IC compares this voltage with its built-in reference. LEDs light up based on the voltage. You can adjust the reference voltage using resistors on Pins 7 (Rhi) and 8 (Rlo). Pin 9 lets you pick dot or bar mode.
This design works well for portable devices, cars, and solar systems. It gives accurate voltage readings and a clear LED display, making it very reliable.
Step-by-Step Assembly
Follow these steps to build the circuit:
-
Gather the Parts: Get the LM3914 IC, 10 LEDs, resistors (R1 = 1.2kΩ, R2 = 3.6kΩ), a 10kΩ potentiometer, and a battery (e.g., 12V or 9V).
-
Attach the LEDs: Connect LEDs to Pins 1 through 10 of the IC. Make sure each LED is connected the right way.
-
Set Voltage Range: Use R1 and R2 on Pins 7 (Rhi) and 8 (Rlo) to set the voltage range. Adjust the potentiometer for fine-tuning.
-
Connect the Battery: Attach the battery’s positive terminal to Pin 5 (VIN). Connect the negative terminal to Pin 2 (ground).
-
Choose Display Mode: For bar mode, connect Pin 9 to VCC. Leave Pin 9 unconnected for dot mode.
-
Power the Circuit: Connect Pin 3 to the battery’s positive terminal and Pin 2 to the negative terminal.
-
Test the Circuit: Turn it on and check the LEDs. Adjust the potentiometer if needed to match the battery voltage.
These steps make building a battery indicator simple. The LM3914 IC gives accurate readings and a clear LED display, making it useful for many projects.
Tip: If the input voltage changes a lot, use a voltage regulator like LM7805. This keeps the LM3914 IC working steadily.
Configuring the LM3914 IC
Setting the Reference Voltage
The LM3914 IC needs a reference voltage to work. This voltage sets the range of input voltages it can measure. It ensures the LEDs light up correctly based on the input. To set this, connect resistors R1 and R2 to Pins 7 (Rhi) and 8 (Rlo). These resistors decide the highest and lowest voltage for the LED display.
For example, a 12V battery might need a range of 10V to 15V. Choosing the right resistors helps achieve this range. A 10kΩ potentiometer can also be added for fine adjustments. This makes sure the LM3914 IC shows the battery level accurately.
Tip: Check the reference voltage with a multimeter first. This avoids mistakes in the LED display.
Dot Mode vs. Bar Mode
The LM3914 IC has two modes: dot mode and bar mode. These modes control how the LEDs light up.
-
Dot Mode: Only one LED lights up at a time. This matches the current voltage level. Dot mode saves power, so it’s good for portable devices. Leave Pin 9 unconnected to use this mode.
-
Bar Graph Mode: All LEDs light up in order, showing the voltage level. This mode gives a clearer view of the voltage. Connect Pin 9 to VCC to use this mode.
For example, dot mode is great for saving energy in a power bank. Bar graph mode works well in solar systems to show battery charge clearly. Pick the mode that fits your project.
Example: Use bar mode for detailed battery levels in solar systems. Use dot mode in portable devices to save power.
The LM3914 IC makes switching between these modes easy and useful for many projects.
Testing and Troubleshooting
Checking the LED Display
Testing the LED display makes sure the LM3914 IC works right. Start by connecting the battery to the circuit. The battery’s voltage goes into Pin 5 of the LM3914 IC. Watch the LEDs light up based on the battery’s charge. Each LED shows a specific voltage range, helping you see the battery’s status.
To test, adjust the potentiometer to set the reference voltage. This ensures the LEDs show the battery’s charge correctly. For a 12V battery, set the range between 10V and 15V. Check if the LEDs light one by one in dot mode or all together in bar mode. This confirms the LM3914 IC is reading the battery voltage properly.
Fixing Common Problems
Sometimes, problems happen during testing. If no LEDs light up, check all connections. Make sure they are tight and correct. Also, confirm the battery gives enough power to the circuit. If the LEDs still don’t work, check the LM3914 IC for damage.
If LEDs light up wrong, the reference voltage might be off. Use a multimeter to check it. Adjust the potentiometer to fix the voltage. Also, ensure resistors R1 and R2 are in the right spots to set the voltage range.
If LEDs flicker or act oddly, look for loose wires or broken parts. Check that Pin 9 is set for the correct mode. These steps help keep the LM3914 IC working well for monitoring.
Note: Test the circuit often to avoid problems and keep it accurate.
Making a battery level indicator with the LM3914 IC is simple and fun. Follow the steps: gather parts, set the reference voltage, and pick dot or bar mode. This circuit helps check battery voltage easily. The LM3914 IC changes analog signals into an LED display. It works well for portable gadgets and solar systems.
|
Feature |
Advantage |
|---|---|
|
Reliability |
Works steadily while using little power. |
|
Visual Representation |
Shows clear feedback, making it easy to use anywhere. |
|
User Feedback |
Perfect for devices that run on batteries. |
This project shows how flexible the LM3914 IC is. Try different setups to learn more. Use it for DIY tasks or professional needs. It’s a handy way to monitor voltage.
Tip: Try using it for sound meters or temperature displays to see all the LM3914 IC can do.
What does the LM3914 IC do in a battery indicator?
The LM3914 IC changes the battery’s voltage into an LED display. It shows how much charge the battery has by lighting LEDs.
How does the LM3914 decide which LEDs to light?
The IC checks the input voltage at Pin 5. It compares this with its built-in reference voltage. Then, it lights up LEDs based on the voltage level.
Can the LM3914 work with different batteries?
Yes, the LM3914 works with many batteries like 12V or 9V ones. You can adjust the reference voltage and resistors to match different batteries.
What’s the difference between dot mode and bar mode?
Dot mode lights one LED at a time to save power. Bar mode lights several LEDs for a clearer view. Pin 9 controls the mode: connect it to VCC for bar mode or leave it unconnected for dot mode.
Where can you use this circuit?
This circuit is great for portable devices, car batteries, and solar systems. It helps check battery voltage easily and in real-time.
Tip: Use bar mode for detailed solar system monitoring. Use dot mode to save power in gadgets like power banks.