
The BME680 sensor is great for checking the environment. It tracks temperature, humidity, air pressure, and gas levels. This makes it useful for air quality checks and weather updates. It measures temperature with ±1.0°C accuracy and humidity with ±3% accuracy. The pressure sensor works between 300-1100 hPa with ±1 hPa accuracy. When used with an Arduino board, it collects and analyzes data in real time. This setup helps in smart homes, wearable gadgets, and safety systems. It is a dependable tool for many environmental sensing tasks.
Key Takeaways
-
The BME680 sensor checks temperature, humidity, air pressure, and gas levels. It is great for tracking the environment.
-
Attach the BME680 to an Arduino using I2C or SPI connections. These give you different ways to communicate.
-
Add the Adafruit BME680 library in Arduino IDE. This makes coding and using the sensor easier.
-
Use live data from the BME680 for smart homes, weather tools, or checking air quality.
-
The sensor is small and uses little power. It works well for IoT projects and portable gadgets.
Features of the BME680 Environmental Sensor
Temperature, Humidity, Pressure, and Gas Measurement
The BME680 sensor combines four environmental readings in one small device. It checks temperature, humidity, pressure, and gas levels with great accuracy. This makes it perfect for keeping track of the environment. Below is a table showing its performance:
|
Sensor Type |
Metric |
Value |
|---|---|---|
|
Temperature |
Accuracy |
±1.0 ºC |
|
Humidity |
Accuracy |
±3 % |
|
Pressure |
Accuracy |
±1 hPa |
|
Temperature |
Operating Range |
-40 to 85 ºC |
|
Humidity |
Operating Range |
0 to 100 % |
|
Pressure |
Operating Range |
300 to 1100 hPa |
|
Gas |
Response Time (33-63%) |
< 1 s (for new sensors) |
|
Humidity |
Response Time (0-63%) |
~8 s |
The sensor can detect harmful gases like VOCs, which helps monitor air quality. Its quick response time allows it to collect data instantly. This is useful for weather stations and smart home devices.
Advantages of the BME680 for IoT Applications
The BME680 sensor has many benefits for IoT projects. Its small size fits into tiny devices like wearables and smart gadgets. It uses little power, saving battery life in portable devices. It works well in different temperatures and humidity levels, making it versatile.
Key benefits include:
-
Real-time air quality updates help users stay informed.
-
Tracks gas, pressure, humidity, and temperature for full monitoring.
-
Supports healthier living with smart features.
-
Meets modern eco-friendly standards.
These features make the BME680 sensor a great choice for IoT projects like smart farming, factory safety, and city air monitoring.
Application Scenarios for the BME680 Sensor
The BME680 sensor is useful in many areas because of its flexibility. Some examples include:
-
Personal Air Quality Tracking: People can check air quality around them to stay healthy.
-
Air Quality Mapping: Collect data from different places to map air quality.
-
In-Car and Public Transport Monitoring: Measures air quality in vehicles to check pollution and airflow.
-
Smart Home Systems: Improves HVAC systems and air purifiers by detecting gases.
-
Weather Stations: Tracks temperature, humidity, and pressure for weather updates.
-
Industrial Safety: Finds dangerous gases to keep workers safe in factories.
The BME680 sensor is a powerful tool for environmental monitoring and IoT projects.
Understanding the BME680 Pinout and Interfacing with Arduino
Pinout Overview
The BME680 sensor features multiple pins that enable its connection to an Arduino board. Each pin serves a specific purpose, making it essential to understand their functions before setting up the circuit. Below is a detailed table of the BME680 pinout:
|
Pin Name |
Description |
|---|---|
|
VCC |
Powers the sensor. Connect to the 3.3V or 5V pin on the Arduino. |
|
GND |
Common ground pin for power and logic. |
|
SCL |
Acts as the clock pin for I2C communication or the serial clock (SCK) for SPI. |
|
SDA |
Functions as the data pin for I2C or the data input (SDI/MOSI) for SPI. |
|
SDO |
Outputs data in SPI mode (MISO). |
|
CS |
Chip Select pin used to choose SPI communication. |
The sensor supports both I2C and SPI communication protocols, providing flexibility for various applications. For I2C setups, the SCL and SDA pins handle communication, while SPI mode requires additional connections to the SDO and CS pins.
I2C and SPI Communication Protocols
The BME680 sensor can communicate with Arduino using either I2C or SPI protocols. Each protocol has unique advantages, and the choice depends on the specific requirements of the project.
I2C Communication
I2C communication is simple and requires only two pins: SCL and SDA. This protocol is ideal for projects where pin availability is limited. To interface the BME680 with Arduino in I2C mode:
-
Connect the VCC pin of the sensor to the 3.3V or 5V pin on the Arduino.
-
Connect the GND pin to the Arduino’s ground.
-
Link the SCL pin of the sensor to the Arduino’s default SCL pin (A5 for Uno, 21 for Mega).
-
Connect the SDA pin to the Arduino’s default SDA pin (A4 for Uno, 20 for Mega).
Most breakout boards include built-in pull-up resistors for I2C communication. If not, add 4.7kΩ resistors between the SCL/SDA pins and VCC.
SPI Communication
SPI communication is faster than I2C but requires four pins: SCK, SDI, SDO, and CS. This protocol is suitable for applications demanding high-speed data transfer. To interface the BME680 with Arduino in SPI mode:
-
Connect the VCC and GND pins as described for I2C.
-
Link the SCK pin of the sensor to pin 13 on the Arduino.
-
Connect the SDI pin to pin 11, the SDO pin to pin 12, and the CS pin to pin 10.
The choice between I2C and SPI depends on the project’s needs. I2C is simpler and uses fewer pins, while SPI offers faster communication.
Components and Circuit Setup for the BME680 Sensor

Needed Parts
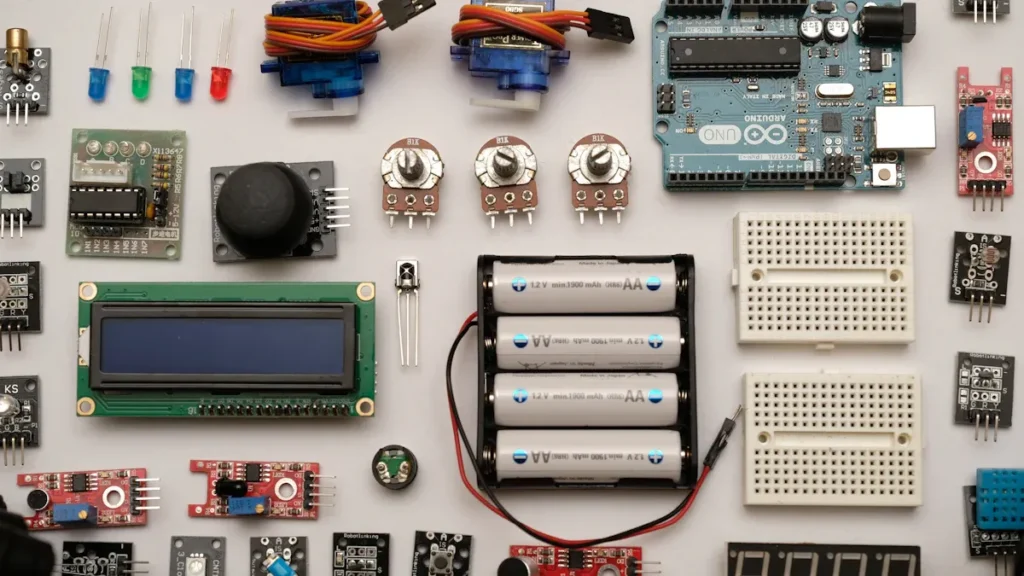
To connect the BME680 sensor to an Arduino, you will need:
-
BME680 sensor module
-
Arduino Uno or Arduino Mega 2560
-
Breadboard
-
Jumper wires (male-to-female)
-
4.7 kΩ resistors (optional for I2C)
The table below lists extra parts for better circuit performance:
|
Value |
Part Number |
Qty |
RefDes |
Name |
|---|---|---|---|---|
|
0.1uF |
C0402 |
2 |
C1, C2 |
Capacitor |
|
4.7 kΩ |
R0402 |
2 |
R1, R2 |
Resistor |
These parts help the sensor work smoothly and stay stable.
I2C Wiring Diagram
The BME680 sensor uses I2C, which makes wiring simple. The table below shows how to connect it:
|
BME680 Pin |
Arduino Pin |
Function |
|---|---|---|
|
VCC |
3.3V or 5V |
Powers the sensor |
|
GND |
GND |
Common ground |
|
SCL |
A5 (Uno) / 21 (Mega) |
Sends clock signal |
|
SDA |
A4 (Uno) / 20 (Mega) |
Sends data |
Tip: Some BME680 boards already have pull-up resistors. If not, add 4.7 kΩ resistors between SCL/SDA and VCC.
The table below explains why each part is important in the I2C setup:
|
Component |
Function |
Importance |
|---|---|---|
|
VDDIO |
Powers interface circuitry |
Needed for communication |
|
VDD |
Powers digital core |
Runs the sensor |
|
GND |
Ground for power and signals |
Keeps circuit stable |
|
SCL |
Sends clock signal |
Controls data timing |
|
SDA |
Sends and receives data |
Shares information |
SPI Wiring Diagram
For faster data transfer, use SPI communication. The table below shows SPI pin details:
|
Pin |
Name |
Description |
|---|---|---|
|
1 |
VDD |
Power Supply (1.7V to 3.6V) |
|
2 |
GND |
Ground |
|
3 |
SCL |
SPI Clock |
|
4 |
SDA |
SPI Data Input/Output |
|
5 |
CSB |
Chip Select |
|
6 |
SDO |
Serial Data Output |
To connect the BME680 sensor to Arduino in SPI mode:
-
Attach VCC to 3.3V or 5V
-
Attach GND to GND
-
Attach SCL to Pin 13
-
Attach SDI (SDA) to Pin 11
-
Attach SDO to Pin 12
-
Attach CS to Pin 10
This setup ensures fast and reliable communication between the sensor and Arduino.
Installing Libraries and Writing Arduino Code for the BME680
Adding the Adafruit BME680 Library
To use the BME680 sensor with Arduino, you need libraries. The Adafruit BME680 library makes it easy to connect the sensor. Follow these steps to install it:
-
Open Arduino IDE. Go to Sketch > Include Library > Manage Libraries.
-
In the Library Manager, search “adafruit bme680” and click install.
-
Search “Adafruit Unified Sensor” and install the Adafruit_Sensor library.
-
Restart Arduino IDE to load the libraries.
For extra features, download the Grove BME680 library. Check the installation guide for help.
Writing and Uploading Arduino Code
Once the library is installed, writing code becomes simple. Below is an example code for using the BME680 sensor in I2C mode:
#include <Wire.h>
#include <Adafruit_Sensor.h>
#include "Adafruit_BME680.h"

Adafruit_BME680 bme;

void setup() {
  Serial.begin(115200);
  if (!bme.begin()) {
    Serial.println("Could not find a valid BME680 sensor, check wiring!");
    while (1);
  }
  bme.setTemperatureOversampling(BME680_OS_8X);
  bme.setHumidityOversampling(BME680_OS_2X);
  bme.setPressureOversampling(BME680_OS_4X);
  bme.setIIRFilterSize(BME680_FILTER_SIZE_3);
  bme.setGasHeater(320, 150);
}

void loop() {
  if (!bme.performReading()) {
    Serial.println("Failed to perform reading!");
    return;
  }
  Serial.print("Temperature = ");
  Serial.print(bme.temperature);
  Serial.println(" *C");
  Serial.print("Pressure = ");
  Serial.print(bme.pressure / 100.0);
  Serial.println(" hPa");
  Serial.print("Humidity = ");
  Serial.print(bme.humidity);
  Serial.println(" %");
  Serial.print("Gas Resistance = ");
  Serial.print(bme.gas_resistance / 1000.0);
  Serial.println(" KOhms");
  delay(2000);
}
This code sets up the BME680 sensor, adjusts settings, and reads data like temperature and humidity. Use the Upload button in Arduino IDE to send the code to your board.
Fixing Common Problems
Sometimes, issues happen when using the BME680 sensor. Here are some common problems and fixes:
|
Problem |
Fix |
|---|---|
|
Sensor Not Found |
Check wiring and I2C address. Ensure the power supply is correct. |
|
Wrong Readings |
Keep the sensor in open air. Calibrate it if needed. |
|
Communication Problems |
Check I2C or SPI connections. Add pull-up resistors if necessary. |
Good wiring, calibration, and proper libraries solve most issues. This ensures the BME680 sensor works well.
Demonstrating the BME680 Sensor in Environmental Monitoring
Real-Time Data Display on Serial Monitor
The BME680 sensor shows live data when linked to Arduino. You can see temperature, humidity, pressure, and gas levels on the Serial Monitor. This is great for checking if the sensor works correctly.
Here are some sample readings from the Serial Monitor:
|
Measurement Type |
Value |
|---|---|
|
Temperature |
29.37 °C |
|
Pressure |
866.53 hPa |
|
Humidity |
28.59 % |
|
Gas Resistance |
80.58 KOhms |
|
Approx. Altitude |
1300.03 m |
|
Temperature |
29.83 °C |
|
Pressure |
866.55 hPa |
|
Humidity |
27.85 % |
|
Gas Resistance |
87.49 KOhms |
|
Approx. Altitude |
1299.65 m |
These numbers show the sensor gives steady and accurate data. You can change the Arduino code to update data faster or add calculations like dew point.
Visualizing Data on an LCD or OLED Display
You can use a screen to show BME680 sensor data. This is helpful for projects where no computer is used.
Main features of this setup:
-
Uses a small 0.66-inch OLED screen for data display.
-
Includes an ESP8266 D1 Mini to process the data.
-
Connects all parts on a PCB for a neat design.
Another example uses Arduino with the BME680 sensor. It shows gas, pressure, temperature, and humidity on an OLED screen. The screen updates quickly, making it easy to see changes.
Practical Applications in IoT Projects
The BME680 sensor works well in many IoT projects. Here are some examples:
|
Project Name |
Description |
|---|---|
|
Arduino UNO with Adafruit BME680 Sensor Data Logger |
Records temperature, pressure, humidity, and gas data. |
|
Wi-Fi Enabled Weather Station |
Tracks air quality and weather using Wemos D1 Mini and BME680. |
|
ESP32-Based Monitoring System |
Uses solar power and BME680 for environmental sensing. |
|
Environmental Sensor with OLED Display |
Combines ESP8266, BME680, and OLED for live data display. |
These projects show how the sensor measures and displays data well. It is useful for personal or industrial air quality and weather monitoring.
The BME680 sensor is great for tracking the environment with Arduino. By following this guide, you can connect it using I2C or SPI. Install the needed libraries and write code to get live data. It measures temperature, humidity, pressure, and air quality. This makes it useful for weather stations, smart homes, and IoT projects.
The BME680 has many benefits like being small, saving power, and detecting gases. These features make it perfect for accurate environmental sensing. Using BSEC software adds smart tools for checking indoor air quality.
To learn more about the BME680 sensor and Arduino, check the Adafruit BME680 Library Documentation and the Arduino IDE Guide. These guides help both new and skilled users.
What does the BME680 sensor do?
The BME680 checks temperature, humidity, pressure, and gas levels. It is great for tracking air quality and the environment. Its small size and accuracy make it perfect for Arduino projects.
How do you connect the BME680 to an Arduino?
The BME680 links to Arduino using I2C or SPI. For I2C, connect VCC, GND, SCL, and SDA to Arduino pins. This setup allows smooth data sharing between the sensor and Arduino.
Can the BME680 find harmful gases?
Yes, the BME680 detects gases like VOCs. This helps check air quality in homes, offices, and factories. It gives real-time gas resistance readings for better analysis.
Where is the BME680 used with Arduino?
The BME680 works in weather stations, smart homes, and IoT devices. It tracks things like air quality and temperature. Many Arduino projects use it for live monitoring and data recording.
Why pick the BME680 for IoT projects?
The BME680 is accurate, uses little power, and does many tasks. It works well with Arduino, making it great for IoT uses like farming, wearables, and air quality systems.
See Also
Simple Guide For Integrating SN74LVC4245APW Sensors
Utilizing ADXL357BEZ For Motion Sensing And Stabilization
Integrating AEAT-8800-Q24 To Boost Robotics Efficiency
ARTESYN NPT42-M: Driving Automation In Industrial Settings
Step-By-Step Guide To Smart Home Automation With STM32F030C8T6