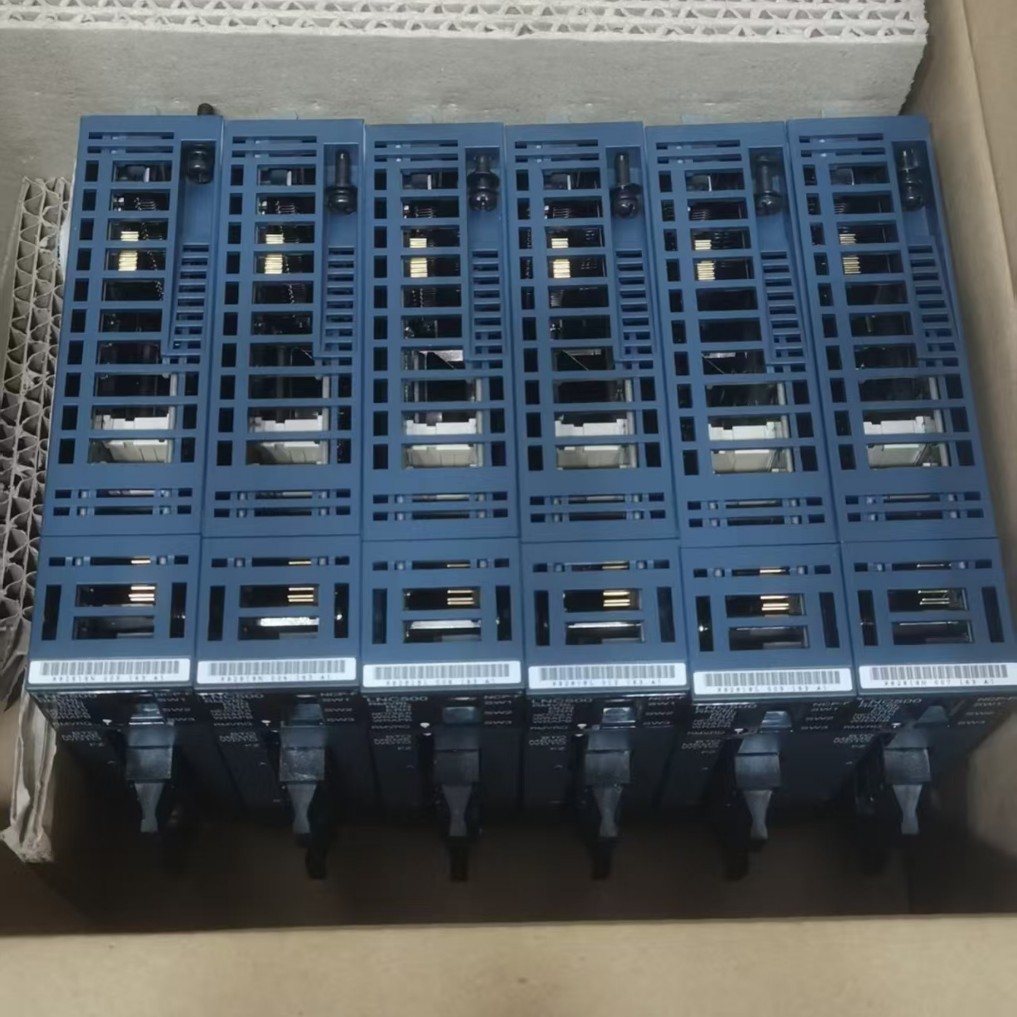
Remote management is vital for modern data centers and helps distributed IT infrastructure. The LFI500 LFI-500 Hitachi Compute Blade 500 Series remote console offers significant advantages. You can reduce downtime and troubleshoot systems remotely, making maintenance efficient. This powerful tool provides KVM over IP, virtual media capabilities, and full power control. For specific needs, LFI-500, DIF HITACHI Sales offers comprehensive solutions.
Key Takeaways
The Hitachi LFI500 remote console lets you control your server from anywhere. You do not need to be physically present.
This tool offers KVM over IP, virtual media, and full power control. You can see the server screen, use your keyboard and mouse, and install software.
Before connecting, set up your network, browser, and user permissions. This ensures a smooth and secure connection.
You can perform important tasks like turning the server on or off, restarting it, and installing operating systems. You can also update firmware.
Troubleshoot connection issues by checking your network, Java settings, and browser. Contact support if problems continue.
Understanding the LFI500 Remote Console
Remote Console Overview
The remote console provides a powerful tool for managing your LFI500 LFI-500 Hitachi Compute Blade 500 Series servers. Think of it as having direct access to your server’s keyboard, video, and mouse (KVM) from any location. You do not need to be physically present in the data center. This console gives you a direct view of the server’s boot process, BIOS settings, and operating system installation. It operates independently of the server’s operating system. This means you can troubleshoot issues even if the OS is not running.
Key Features
The remote console offers several essential features. First, you get KVM over IP. This allows you to see the server’s display and interact with it using your keyboard and mouse, all through a web browser. Second, virtual media support is available. You can mount ISO images or floppy disk images from your local computer to the remote server. This feature is crucial for installing operating systems or updating firmware. Third, you have complete power control. You can power on, power off, or restart the blade server remotely. This helps you manage server states without physical intervention.
Administrator Benefits
As an administrator, you gain significant advantages from using the remote console. You reduce downtime because you can quickly diagnose and fix problems from anywhere. This means faster issue resolution. You also enable off-site troubleshooting. You do not need to travel to the data center for many tasks. This saves time and resources. The console facilitates efficient maintenance. You can perform OS installations, firmware updates, and system reboots with ease. This improves your overall operational efficiency. The remote console makes managing your Hitachi blade servers simpler and more effective.
Remote Console Access Prerequisites
Before you connect to the LFI500 Compute Blade 500 Series remote console, you must complete some essential setup steps. These prerequisites ensure a smooth and secure connection. You will avoid common issues by preparing your environment correctly.
Network Configuration
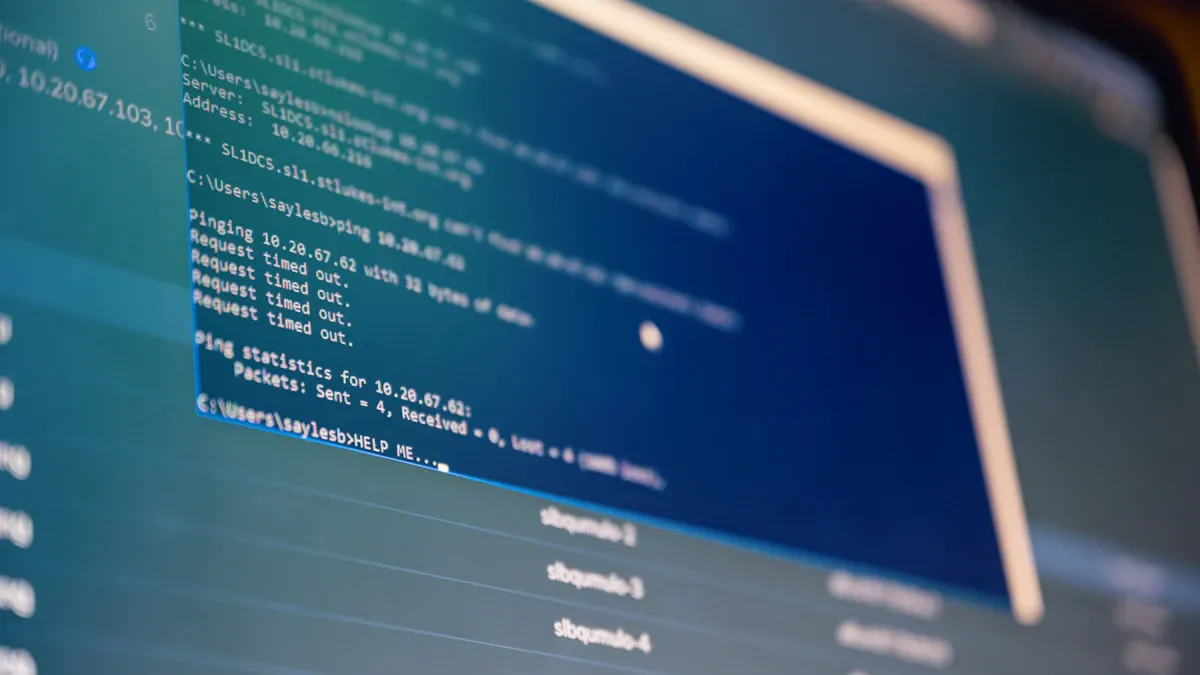
You need proper network configuration. The LFI500 remote console uses a dedicated management network interface. You must assign a static IP address to this interface. Ensure your workstation can reach this IP address. Your network firewall must allow traffic on the necessary ports. Typically, the remote console uses HTTPS (port 443) for web access and specific ports for KVM over IP. Consult your network administrator for firewall rules. Verify network connectivity with a simple ping command to the management IP.
Browser and Java Settings
Your web browser requires specific settings. The remote console often relies on Java applets for KVM functionality. You must have a compatible Java Runtime Environment (JRE) installed on your workstation. Ensure your browser supports Java applets. You may need to add the remote console’s IP address to your Java security exception list. This prevents security warnings from blocking the applet. Keep your Java version updated for security and compatibility. Some modern browsers might require specific configurations or extensions to run Java applets.
User Permissions
You need appropriate user permissions. The LFI500 remote console uses role-based access control. You must have a valid username and password. Your account needs sufficient privileges to access and control the blade server. An administrator typically sets up these accounts. Ensure your account has permissions for KVM access, virtual media, and power control. Without correct permissions, you cannot perform critical management tasks.
Hardware and Software Needs
Your local workstation has minimal hardware requirements. You need a standard computer with a network connection. Ensure your operating system is up-to-date. You also need a supported web browser. Popular browsers like Chrome, Firefox, or Edge usually work. Verify your browser version is compatible with the remote console’s web interface. Install the necessary Java JRE if the console uses Java for KVM. These software components are crucial for a functional remote console experience.
Connecting to the Remote Console
You are now ready to establish a connection to your remote console. Follow these steps carefully. You will initiate a remote session. This allows you to manage your blade server from any location.
Locate Management IP Address
First, you must find the management IP address for your LFI500 LFI-500 Hitachi Compute Blade 500 Series. This IP address belongs to the Baseboard Management Controller (BMC) or the Chassis Management Module (CMM). You typically configure this IP during the initial setup of your blade server. If you do not know the IP address, check your network documentation. You can also access the physical chassis management interface. This interface displays the assigned IP address. Ensure you have the correct IP address before proceeding.
Access Web Interface
Open your preferred web browser. Type the management IP address into the address bar. You must use HTTPS for a secure connection. For example, enter https://<BMC IP address>/. Press Enter. This action directs you to the web interface of the remote console. This interface is often referred to as the CB500 SVP web console. You will see a login page. Enter your administrator username and password. These are the credentials you set up during the prerequisites phase. Successfully logging in grants you access to the main management dashboard.
Launch Remote Console
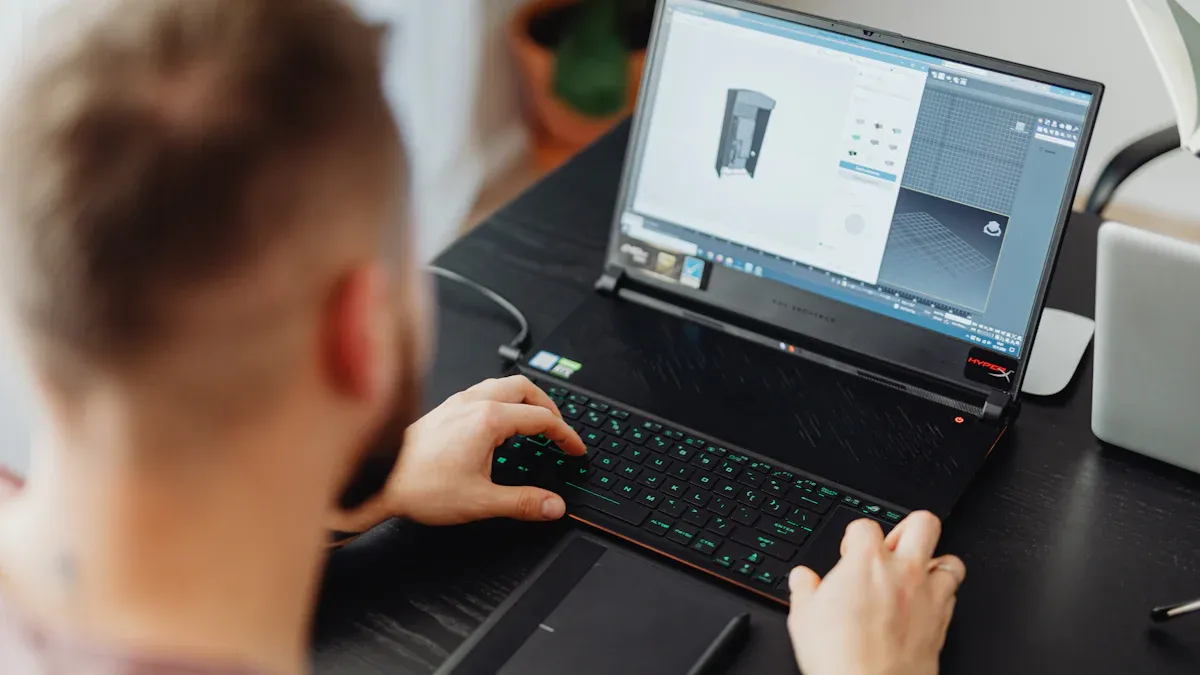
Once you are logged into the web interface, locate the option to launch the remote console. This option usually appears as a button or a link. Look for terms like “Remote Console,” “KVM Viewer,” or “Launch KVM.” Click this button. Your browser may download a small file, often a Java Network Launch Protocol (JNLP) file. Open this file. This action initiates the KVM viewer application. Some newer systems might use an HTML5-based viewer. This viewer launches directly in your browser. You will then see the server’s display. You can now interact with the server as if you were physically present.
Security Warnings and Certificates
You may encounter security warnings during the connection process. Your browser might display a warning about an untrusted security certificate. This is common. The remote console often uses a self-signed certificate. You can safely proceed by accepting the certificate. Look for options like “Proceed to website” or “Add exception.” If you are using a Java-based viewer, Java security prompts may appear. You might need to grant permission for the application to run. Ensure you add the remote console’s IP address to your Java security exception list. This prevents future warnings. Always verify the IP address matches your blade server’s management IP. This ensures you connect to the correct device.
Navigating the Remote Console Interface
You have successfully connected to the remote console. Now, you will learn how to use its graphical interface. This guide helps you understand each part. You can manage your Hitachi LFI500 Compute Blade 500 Series effectively.
Main Dashboard Overview
You see the main dashboard first. This dashboard gives you a complete overview of your server’s status. It shows critical metrics. You can quickly check power status, temperature, and fan speeds. Look for system alerts or error messages here. The dashboard provides a snapshot of your blade server’s health. It helps you identify issues at a glance.
KVM Viewer Functionality
The KVM viewer is your window into the server. It displays the server’s screen output. You interact with it using your local keyboard and mouse. Move your mouse cursor over the viewer window. Your mouse input now controls the remote server. Type on your keyboard. The server receives your keystrokes. This functionality allows you to navigate BIOS settings, install operating systems, or troubleshoot boot issues. It feels like you are sitting directly in front of the server.
Key Menu Options
The remote console interface offers several important menu options. You usually find these at the top or side of the KVM viewer window.
Power Control: Use this menu to power on, power off, or restart the blade server. This is crucial for system maintenance.
Virtual Media: Access this option to mount ISO files or other media. You can install software or update firmware.
Keyboard/Mouse: Adjust settings for your input devices if needed.
Video Settings: Change display resolution or refresh rates. These options give you full control over the server’s operations.
Customize Display Settings
You can customize the KVM viewer’s display settings. This improves your viewing experience. Look for options like “Scale” or “Resolution.” You can adjust the viewer to fit your screen size. This prevents scrolling. You might also find options to change color depth. A higher color depth provides a clearer image. Experiment with these settings. Find what works best for your workstation and network connection. This ensures a comfortable and efficient remote management session.
Performing Common Management Tasks
You have connected to the remote console. Now, you can perform many essential management tasks. These tasks help you maintain your blade servers efficiently. The remote console gives you direct control.
Power On/Off Blade Server
You can control your blade server’s power state remotely. This is a critical function.
Access Power Control: Look for a “Power” menu or icon within the KVM viewer. You usually find it at the top of the window.
Select Action: Choose from options like “Power On,” “Power Off,” “Power Cycle,” or “Reset.”
Power On: Starts the server if it is off.
Power Off: Shuts down the server immediately. Use this option carefully. It is like pulling the power cord.
Power Cycle: Turns the server off, then back on. This is useful for hard resets.
Reset: Performs a soft reset, similar to pressing the reset button on a physical machine.
Confirm Action: The system often asks you to confirm your choice. Confirm to proceed.
Remember, you use the remote console for critical power operations. This differs from using Remote Desktop. Remote Desktop lets you manage the operating system. It does not control the physical power. For example, you cannot configure Intel(R) PROSet settings with Remote Desktop if the OS is not booting. The remote console gives you that low-level access.
Initiate System Reboot
Rebooting a system is a common task. You can do this through the remote console.
Navigate to Power Menu: Go to the “Power” menu in your KVM viewer.
Choose Reboot Option: Select “Power Cycle” or “Reset.” “Power Cycle” performs a hard reboot. “Reset” performs a soft reboot.
Confirm: Confirm the action when prompted.
The server will then restart. You can watch the boot process directly in the KVM viewer. This helps you diagnose startup issues.
Mount Virtual Media
Virtual media allows you to install operating systems or update firmware. You can use ISO files from your local computer.
Access Virtual Media: Find the “Virtual Media” or “Media” option in the remote console menu.
Launch Virtual Media Manager: Click to open the virtual media manager.
Add Image: You will see options to add a local image file. Click “Add Image” or “Browse.”
Select ISO File: Browse your local computer. Select the ISO file you want to mount. For example, choose an ESXi ISO image for OS installation.
Map Device: After selecting the file, click “Map Device” or “Connect.” The remote server now sees your ISO file as a physical CD/DVD drive.
Boot from Virtual Media: You might need to configure the server’s BIOS boot order. Set it to boot from the virtual CD/DVD drive. You can do this through the KVM viewer during server startup.
You can use Remote KVM to connect to the CB500 SVP web console. Log in to the console. Click on the specific blade you want to manage. Then, specify the ISO image for OS installation. This process works well for installing operating systems like ESXi on your LFI500 LFI-500 Hitachi Compute Blade 500 Series.
Capture Screenshots and Video
The remote console helps you document issues. You can capture screenshots or record video of the server’s display.
Locate Capture Options: Look for “Screenshot” or “Video Capture” buttons. These are often in the KVM viewer toolbar.
Take Screenshot: Click the “Screenshot” button. The console saves an image of the current screen. You can then save this image to your local machine.
Record Video: Click “Start Recording” for video. The console records the screen activity. Click “Stop Recording” when you finish. You can save the video file locally.
These features are invaluable for troubleshooting. They help you share visual information with support teams.
Monitor System Health
The remote console provides real-time system health information.
Check Dashboard: The main dashboard shows key metrics. You see CPU temperature, fan speeds, and power consumption.
Review Event Logs: Access the system event logs. These logs record hardware events and errors. They help you identify potential problems.
Set Alerts: Some consoles allow you to configure alerts. You receive notifications for critical events.
Regularly monitoring system health helps you prevent downtime. You can address issues before they become major problems.
Advanced Remote Console Usage
You can explore more sophisticated features and configurations with your remote console. These advanced uses enhance your management capabilities. They help you maintain your Hitachi LFI500 Compute Blade 500 Series servers more effectively.
Virtual Media for Firmware
You already know how to mount virtual media for OS installation. You can also use this feature for firmware updates. This process ensures your hardware runs the latest versions.
Download Firmware: First, download the necessary firmware ISO or image file. Get it from the official Hitachi support website.
Access Virtual Media: Open the “Virtual Media” option in your remote console.
Map Firmware Image: Map the downloaded firmware image to the virtual drive.
Boot to Firmware: Reboot the blade server. Configure its BIOS to boot from the virtual media. The firmware update utility will then launch. Follow the on-screen instructions to complete the update. This method is efficient for maintaining system health.
Configure Security Settings
You must secure your remote console access. You can adjust various security settings.
Change Passwords: Regularly update your administrator password. Use strong, unique passwords.
User Management: Create different user accounts. Assign specific roles and permissions to each user. This limits access to critical functions.
Network Security: Ensure your management network is isolated. Use firewalls to restrict access to the console’s IP address. You can also configure SSL/TLS settings for secure communication.
Manage User Sessions
As an administrator, you can monitor and manage active remote console sessions. This helps you maintain control.
View Active Sessions: The console often provides a list of currently logged-in users. You see who is accessing the system.
Terminate Sessions: You can forcibly disconnect a user’s session if needed. This is useful for security reasons or to free up resources.
Audit Logs: Review audit logs. These logs record user activities. They help you track changes and troubleshoot issues.
Integrate with Management Tools
You can integrate the LFI500 remote console with other management tools. This streamlines your operations.
SNMP Traps: Configure the console to send SNMP traps. These traps alert your network management system about critical events.
API Access: Some remote consoles offer Application Programming Interfaces (APIs). You can use these APIs to automate tasks. Script common operations. This saves time and reduces manual effort.
Centralized Management: Connect the console to a centralized management platform. This allows you to manage multiple blade servers from one interface.
Troubleshooting LFI500 Compute Blade 500 Series Remote Console
You might face issues when you try to use the remote console. This section helps you solve common problems. You can get your remote console working again quickly.
Common Connection Issues
You may find you cannot connect to the remote console. First, check your network cable. Make sure it is plugged in correctly. Next, verify the management IP address. You must use the correct IP for the LFI500 LFI-500 Hitachi Compute Blade 500 Series. Try to ping the IP address from your computer. If the ping fails, a network problem exists. Also, check your firewall settings. Your firewall might block the connection. Ensure it allows traffic on port 443 (HTTPS).
Resolve Java Issues
Many remote consoles use Java. If your console does not launch, Java might be the problem.
Update Java: Make sure you have the latest Java Runtime Environment (JRE). Old versions can cause issues.
Security Settings: Add the remote console’s IP address to your Java security exception list. You find this in the Java Control Panel.
Browser Settings: Some browsers block Java applets. Check your browser’s settings. You might need to enable Java or allow pop-ups from the console’s IP.
Network Diagnostics
Network problems often stop remote console access.
IP Address: Confirm the blade server’s management IP address.
Subnet Mask: Check if your computer and the blade server are on the same subnet.
Gateway: Verify your network gateway settings.
Traceroute: Run a traceroute command to the blade server’s IP. This shows you where the connection fails.
Browser Compatibility
Your web browser can affect console performance.
Supported Browsers: Use a browser known to work with the remote console. Chrome, Firefox, or Edge are common choices.
Clear Cache: Clear your browser’s cache and cookies. Old data can cause display problems.
Extensions: Disable browser extensions. Some extensions can interfere with the console’s web interface.
Contact Support
If you cannot solve the problem, contact support. Gather all the details first. Note any error messages you see. Write down the steps you took to troubleshoot. This information helps the support team assist you faster.
Mastering the Hitachi LFI500 Compute Blade 500 Series remote console is crucial. You gain direct control over your servers. This includes power operations, virtual media, and system monitoring. The remote console is vital for efficient server management, especially in remote or lights-out environments. You can troubleshoot and maintain systems from anywhere. Regularly practice using its features. This builds your proficiency. Effective remote console usage directly improves your operational efficiency and system reliability.
Hitachi LNC 500,Hitachi LPU 500,Hitachi LFI 500,Hitachi LSU 500
Hitachi LPE 510,Hitachi LPF 500,Hitachi LPF 610A,Hitachi LPF 602A
Hitachi LYA 210A,Hitachi LYA 010A,Hitachi LPA 302A2 ,Hitachi LYD 000A
Hitachi LYD 105A
These are our top-selling items currently in stock. Inquiry welcome.
FAQ
What is the main benefit of using the remote console?
You gain direct control over your blade server from any location. This reduces downtime. You can troubleshoot issues and perform maintenance tasks without physically being present. It saves you time and resources.
Do I always need Java to use the remote console?
Many older remote consoles use Java applets for KVM functionality. You might need a compatible Java Runtime Environment. Newer versions often offer HTML5-based viewers. These viewers launch directly in your browser without Java.
Can I install an operating system using the remote console?
Yes, you can. Use the virtual media feature. You can mount an ISO image from your local computer. The server then sees this image as a physical drive. You can install operating systems like ESXi.
What if I forget the management IP address for my blade server?
You can check your network documentation. The IP address is often configured during initial setup. You might also access the physical chassis management interface. This interface displays the assigned IP address.
Is the remote console connection secure?
Yes, it is. The remote console uses HTTPS for secure web access. You can also configure SSL/TLS settings. Always use strong passwords. Limit access with user permissions. This protects your server management.
See Also
Integrating AEAT-8800-Q24: Boosting Robotics Performance with Precision Control
AD74413RBCPZ: Revolutionizing Process Control for Optimal Industrial Efficiency
LPQ252-CEF: Unveiling Its Power for Superior Energy Management Solutions
RV1126: Driving AI Edge Computing in Robotics for Advanced Applications
ATIC83E2: Deep Dive into Its Core for Industrial Automation Success